Simple text extraction for PDF documents using Power Automate
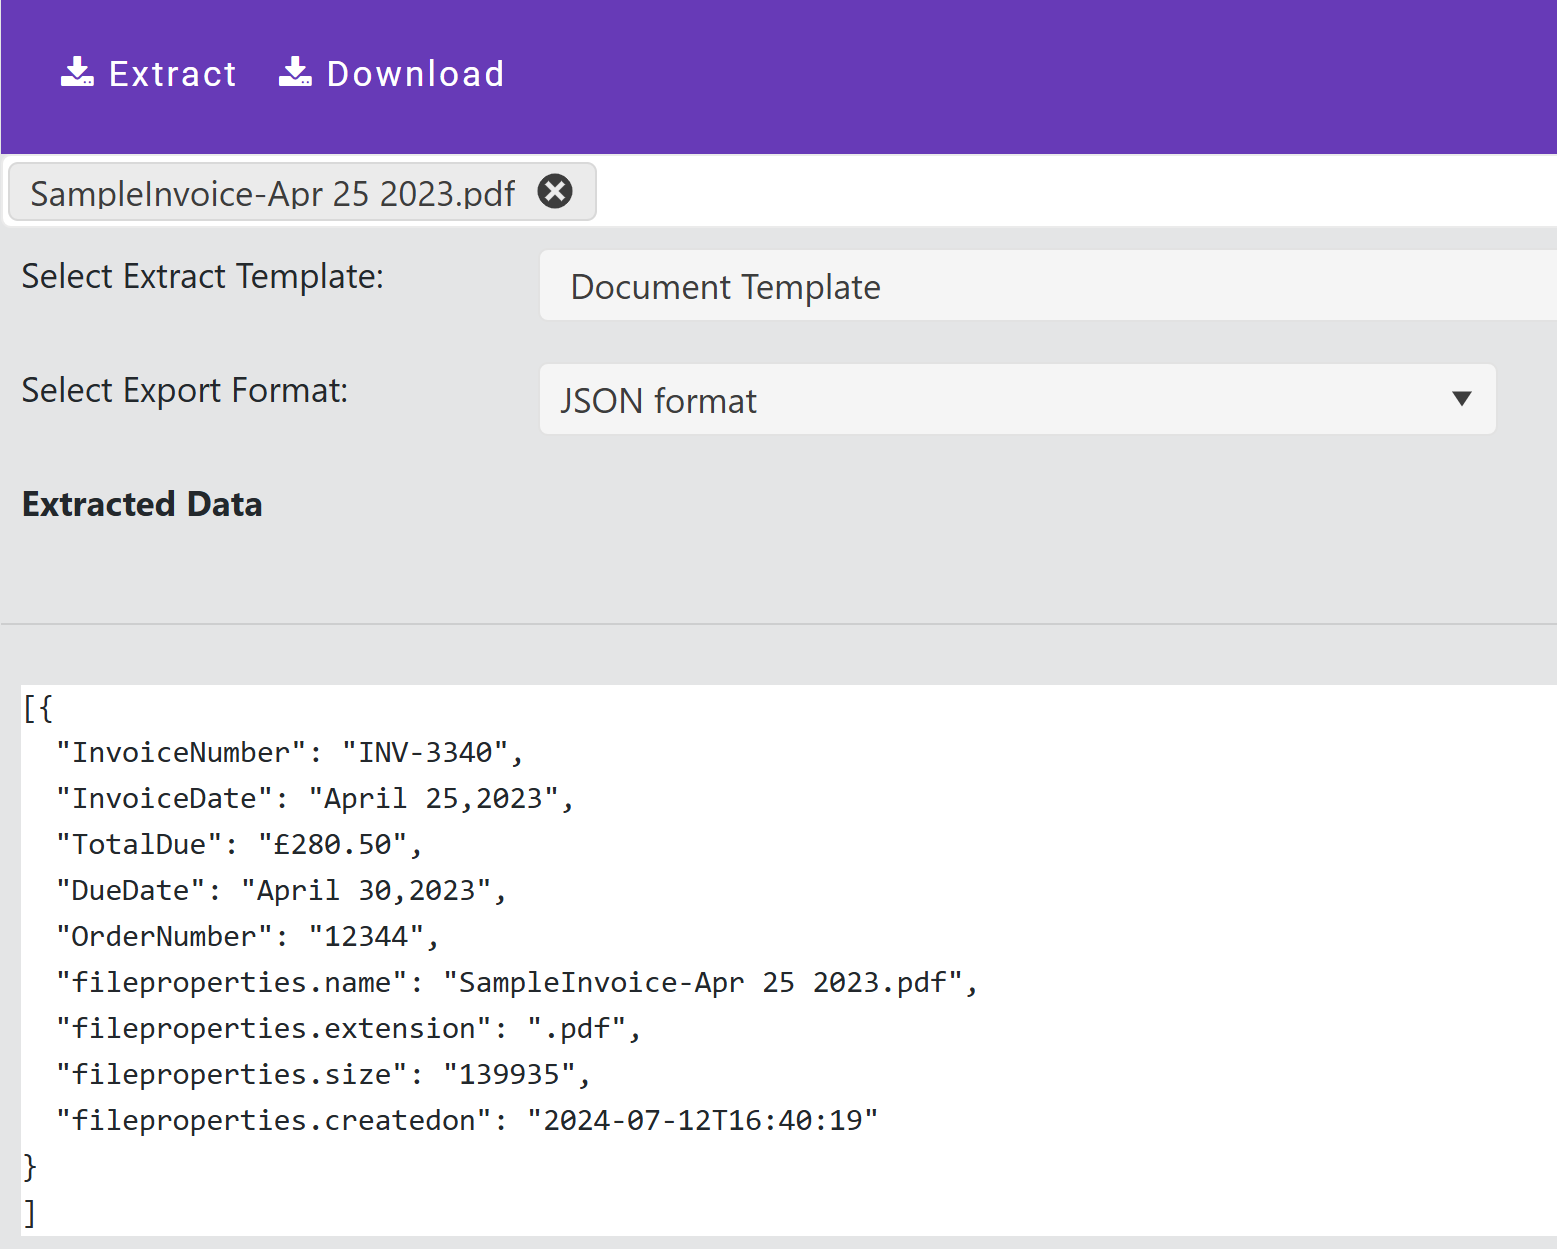
We are going to walk through the steps to extract some data from an Invoice file we have been sent using KeyParse.AI and Power Automate.
We will use the output from our previous blog post as a source of data. We will create a Power Automate table (using CoPilot) as a destination but we could use one of the hundreds of Power Automate connectors
You can think of Power Automate as the glue that can bind different systems together.
Log in
I’ll assume you can sign in to the KeyParse.AI Application if not you can sign up for a free 30 day trial
We also need access to Power Automate, there is either a 90 day free trial or a free Developer account available with limits for free if you want to test things out Power Automate
Note that a Premium license for Power Automate is required when using external connectors.
Data Source
Using the new CoPilot feature in Power Automate we are going to create a Dataverse table to hold our extracted data. This could be used to hold a set of documents data for checking prior to sending the information onward to a Accounting or CRM system.
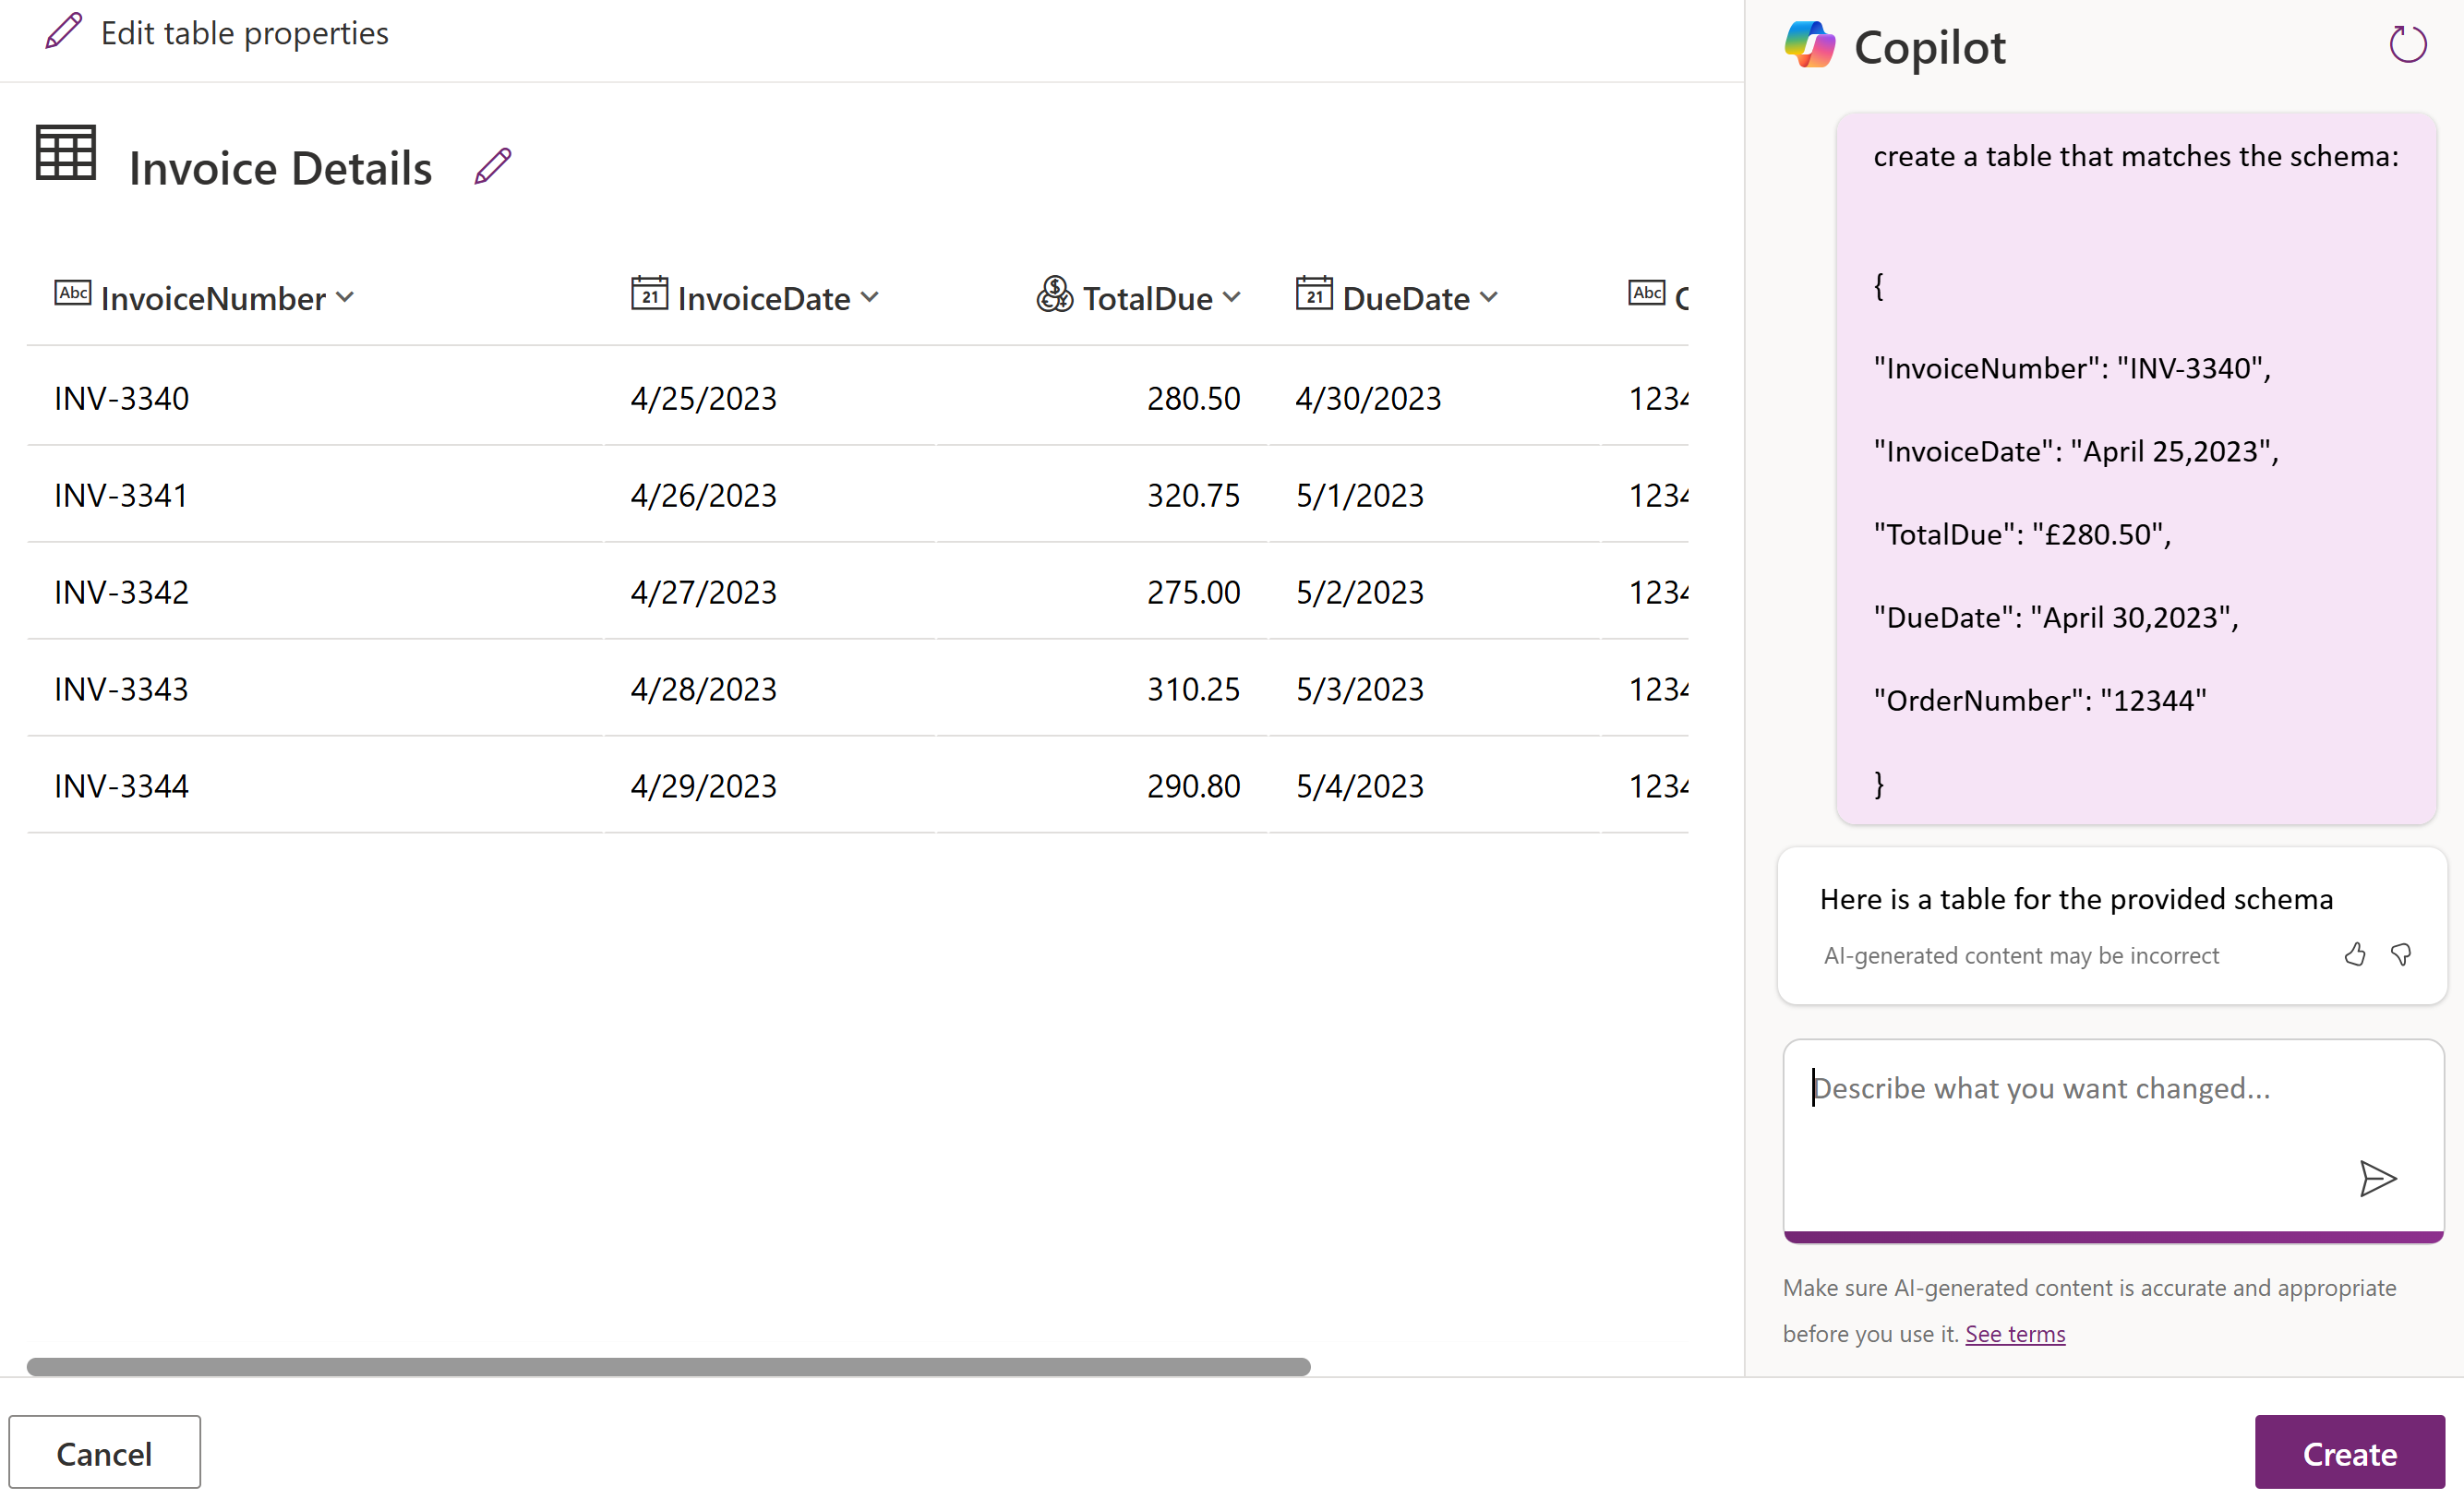
First we go to make.powerautomate.com, click Tables
There is a new option called Describe the new table

We click it and in the Copilot entry box we create a Copilot instruction that will create a table using the JSON schema, note we have removed the ‘fileproperties’ as there is a limit to the number of characters Copilot will accept.
create a table that matches the schema:

{
  "InvoiceNumber": "INV-3340",
  "InvoiceDate": "April 25,2023",
  "TotalDue": "£280.50",
  "DueDate": "April 30,2023",
  "OrderNumber": "12344"
}
Click Create
We now have an Invoice Details table created that will hold our Invoice Data. Pretty simple so far.
The next step is to create a flow so we can link the data from KeyParse.AI into this table.
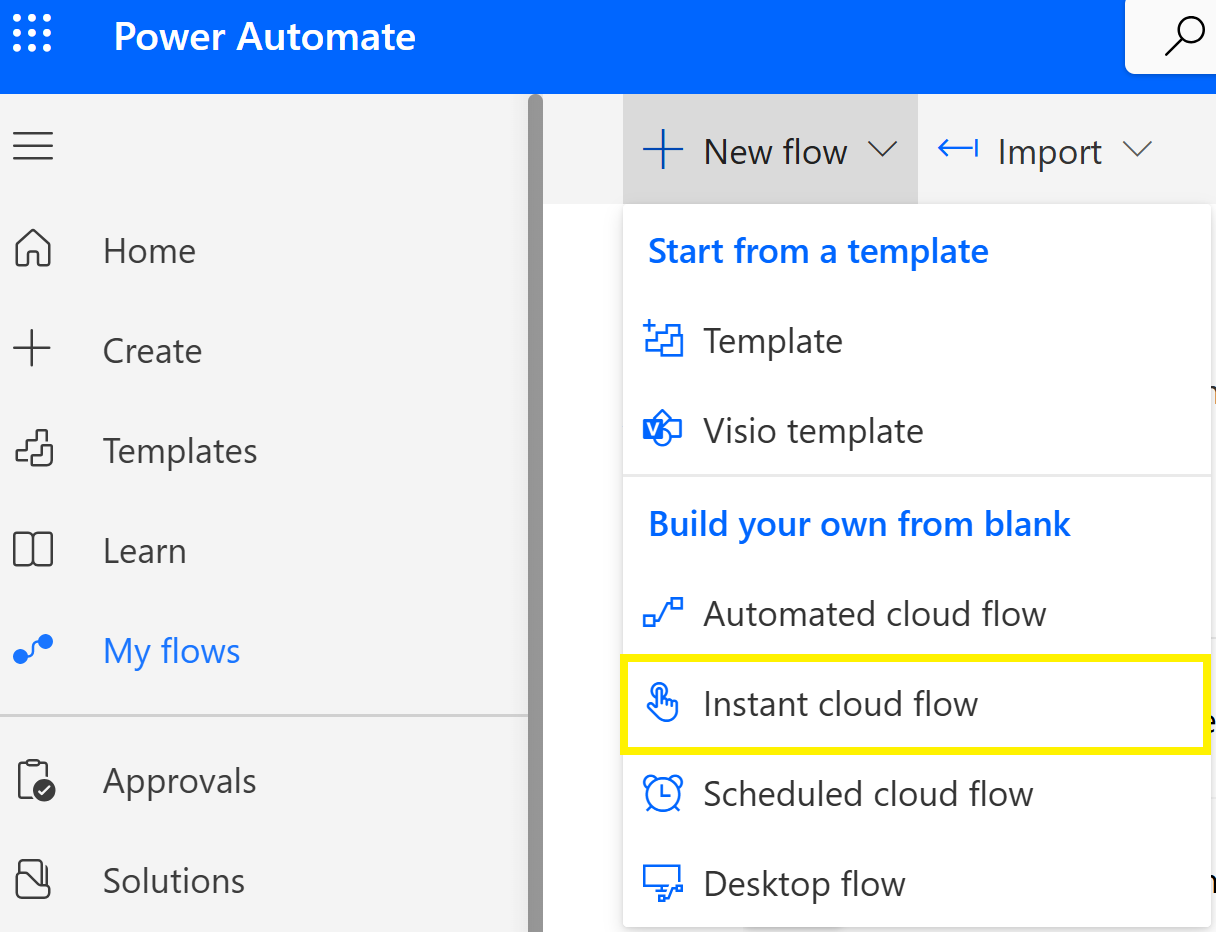
Click My Flows and Instant cloud flow
Give the flow a name, in this case ExtractInvoice, select Manually trigger a flow and click Create

We now see the Flow canvas and the trigger on it, there are different triggers we could have chosen but we want to run this manually so that suits.

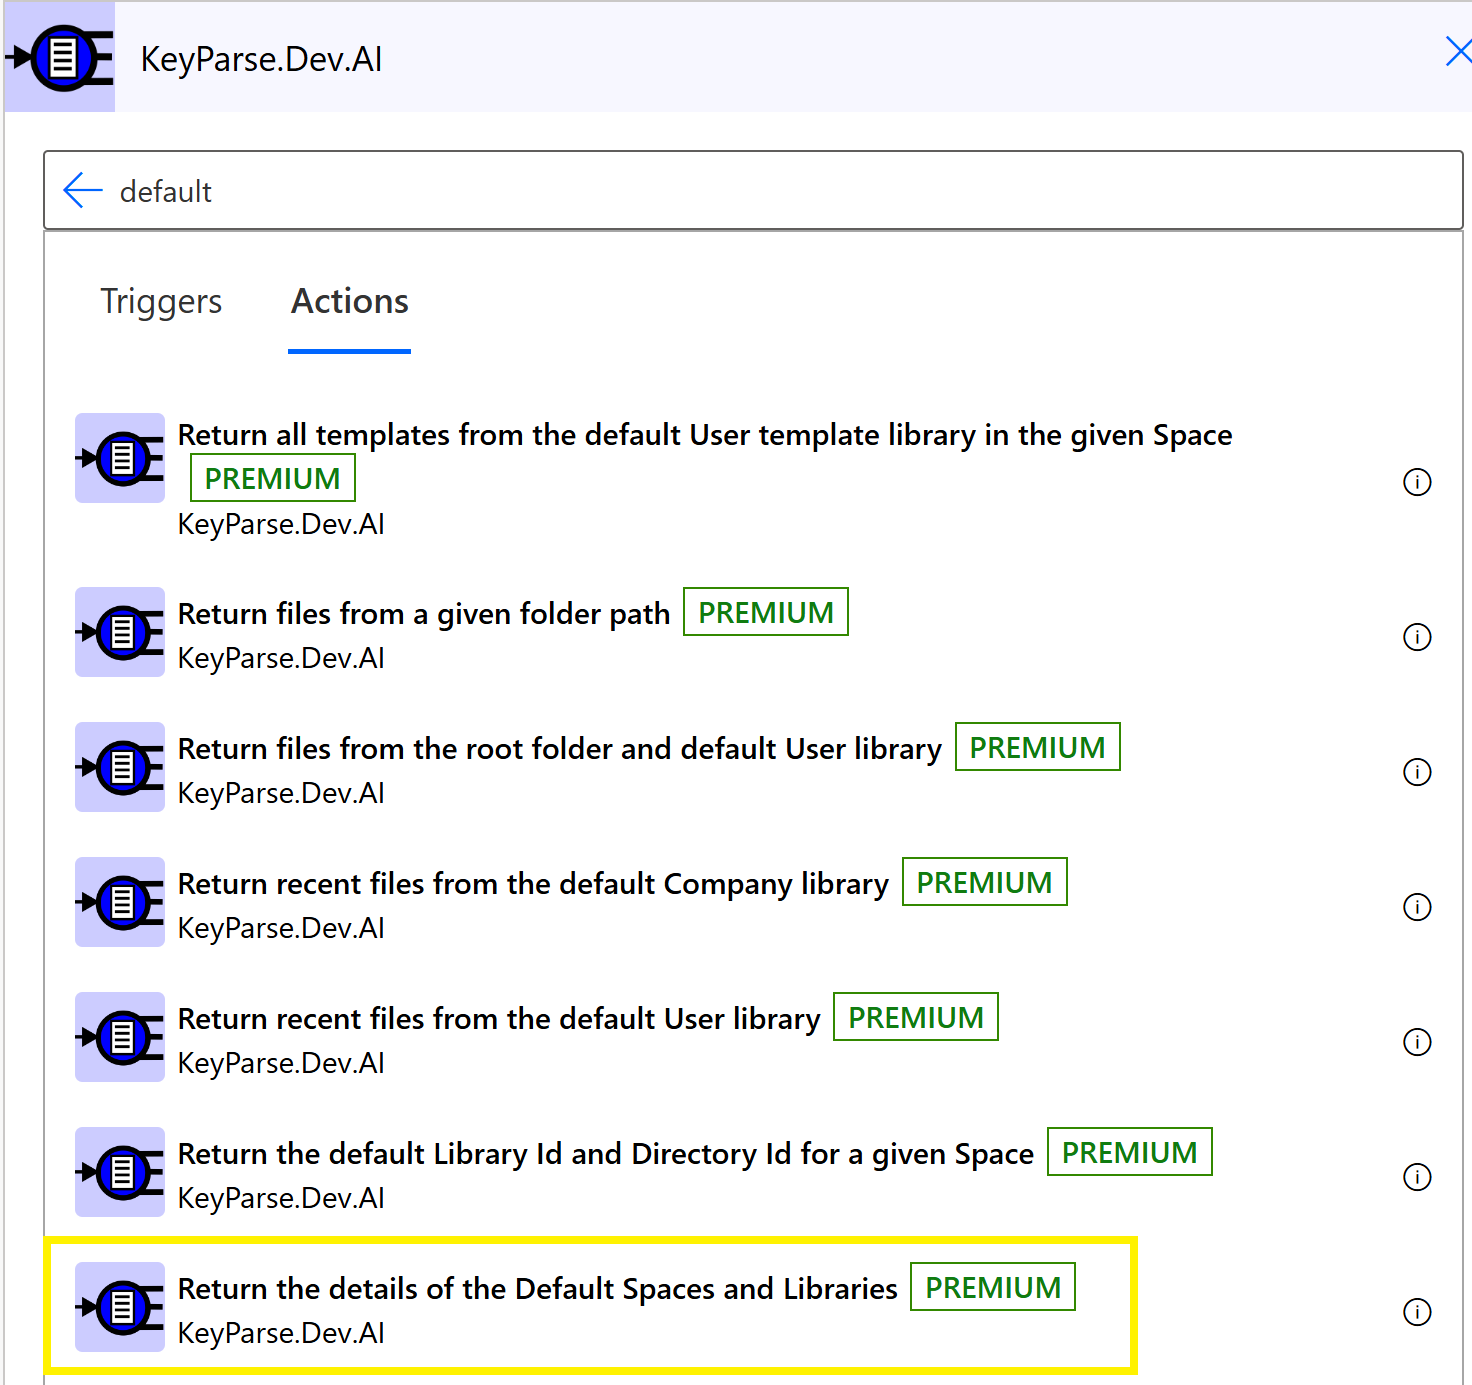
Now click New step and search for KeyParse and select the KeyParse.AI connector. The connector has a lot of methods but for the first call to our service we want to get the details of the Library that holds our file. In the search box type default Click the method that says Return the details of the Default Spaces and Libraries
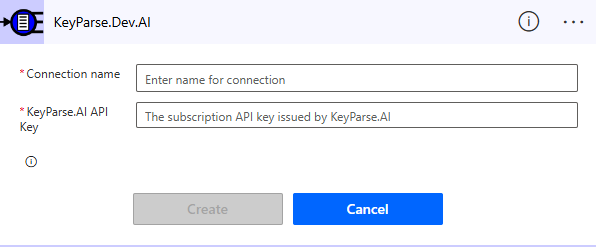
The first time the connector method is added to the flow it will prompt for authentication. In our case you can obtain an API key from the API Keys page
Enter a name for the Connection and the API key into the dialog and click Create
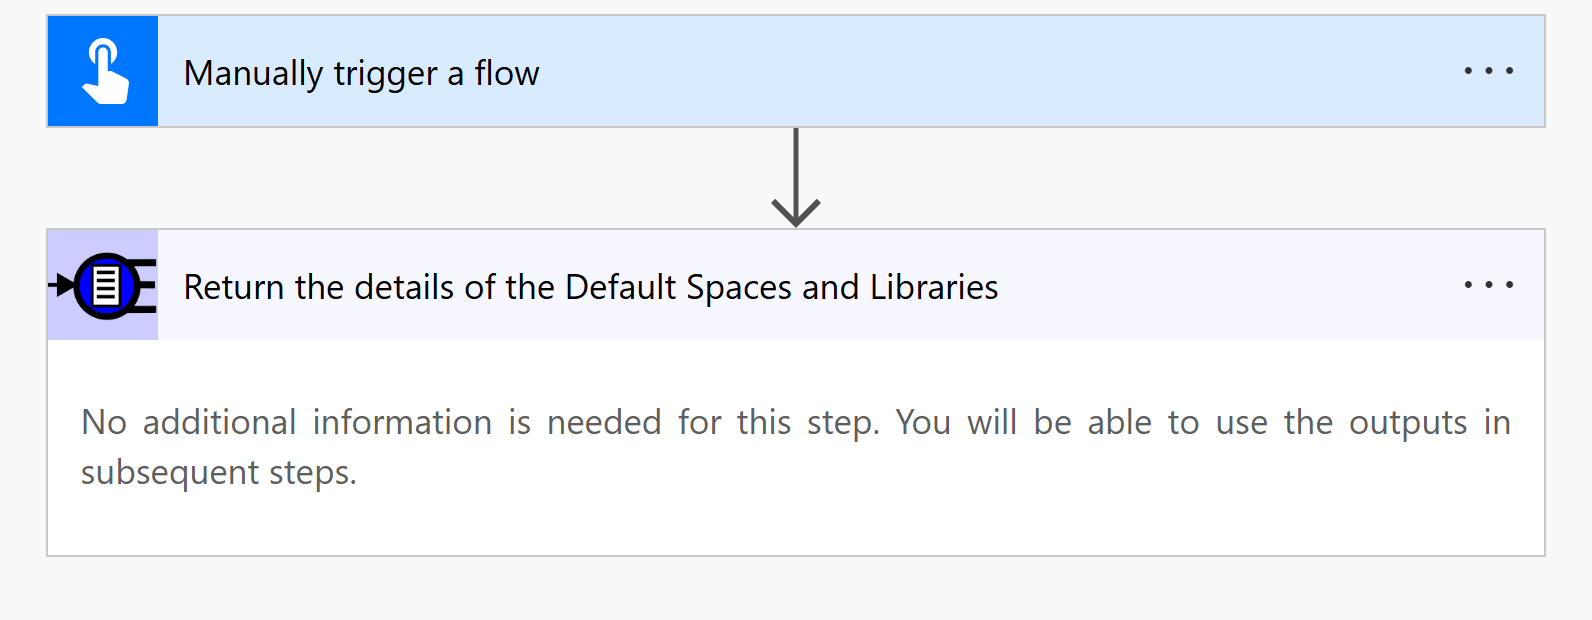
That method is now added as the second step in the Flow. There are no parameters to this method it just returns the Identifiers of the precreated libraries and spaces.
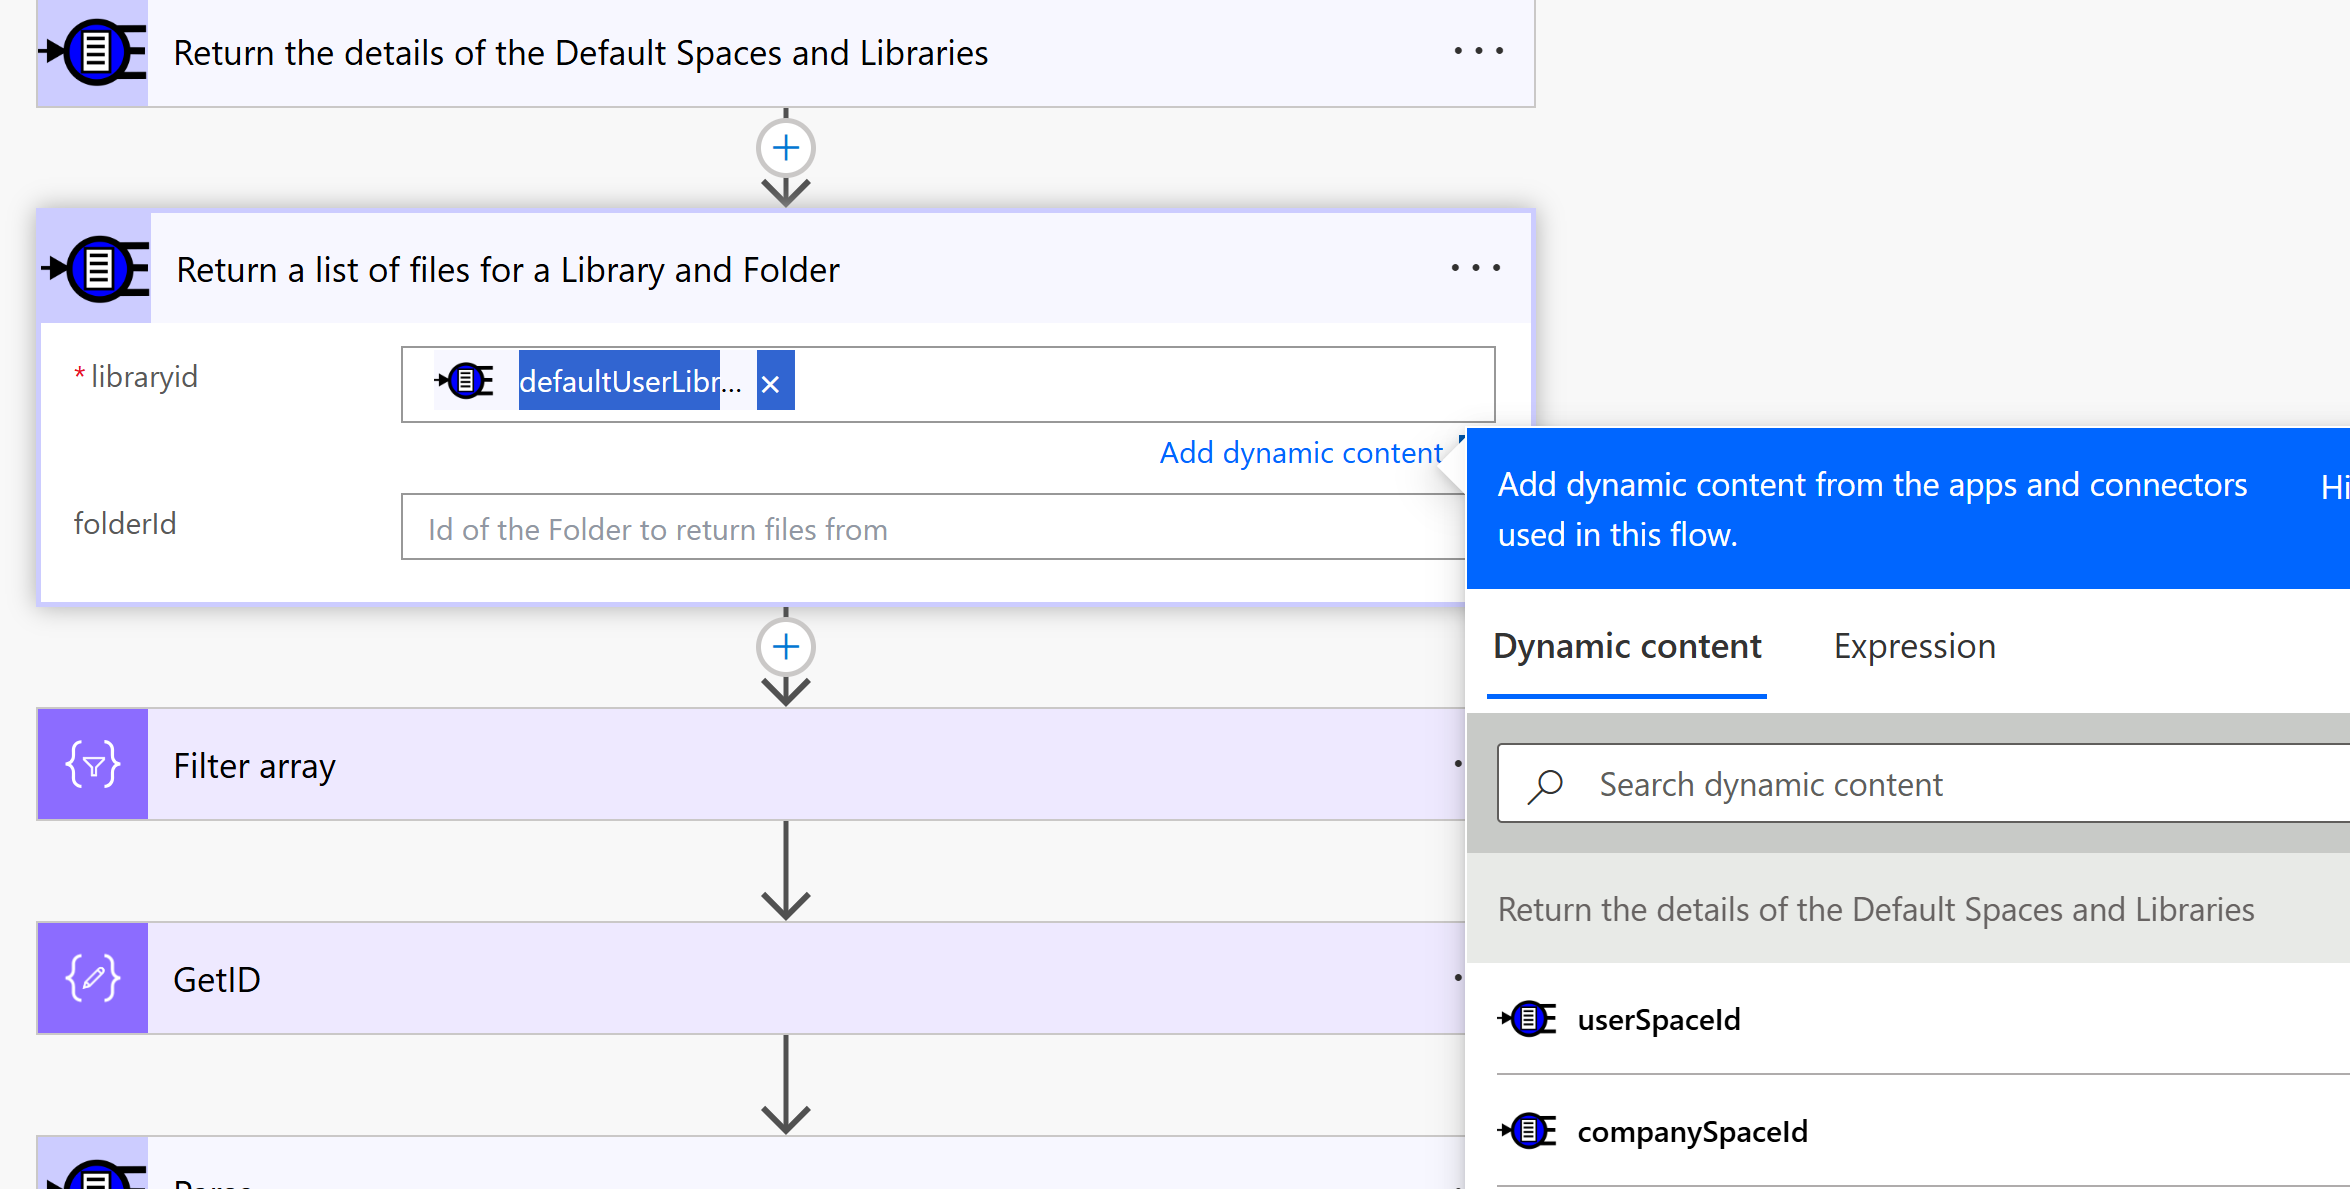
Now do the same process and in the Connector look for Return a list of files for a Library and Folder
Add that to the flow. We want to use the DefaultUserLibraryId from the previous call so enter the libraryid field and choose defaultUserLibraryId from the Return the details of the Default Spaces and Libraries call under the Dynamic Content tab.
We can leave the directoryId as blank as the root folder will be used
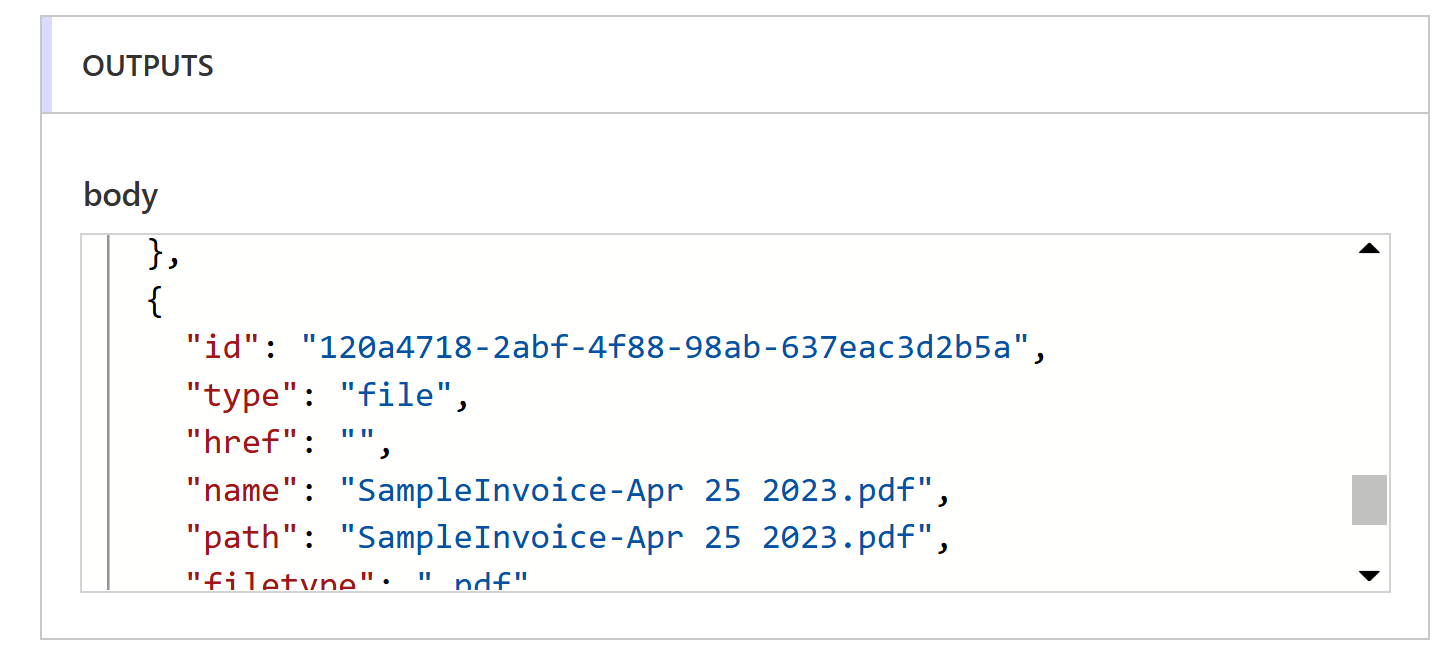
This call will return an array of files with their properties and we want to filter so we select the one file we are interested in.
Lets add a filter operation. Click Add a New Step. In the search box type data filter, this should show the Filter Array Data Operation in the Actions list. Click the Filter array item.
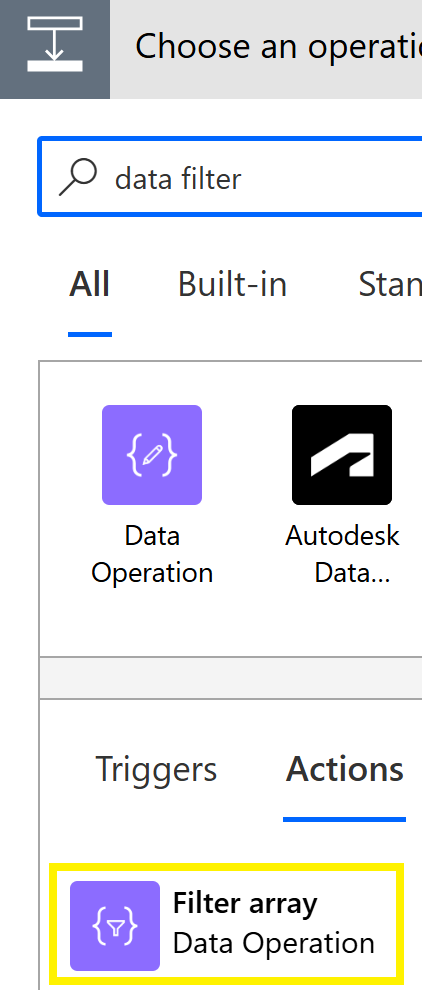
The Filter array operation takes a data source in the From field and then a comparison operation.
We set the From to be the Body from the previous step and filter on the name field for a file starting with in our case ‘SampleInvoice-Apr’

The filter now should return one record for our file of interest but it is still an array. We could create a loop in case we want to process multiple files but in this case we want to single out the one record and get the Id of that record, to do that we will use a formula.
Now Add new Step and search for compose, select the Compose Data Operation item.
We click into the Inputs field and choose the Expression tab. We enter the expression below
first(body('Filter_array'))?['id']
To break this down we first use the ‘body’ function to get the value of the previous Filter Array step, we convert spaces to underscores here.
Then we use the ‘first’ function to the the first item in the array and get its id value by using the property syntax: ?[‘id]
Using the Ellipse on the step we rename it to GetID so we know what it does.
Now we want to call our KeyParse.AI Parse function.
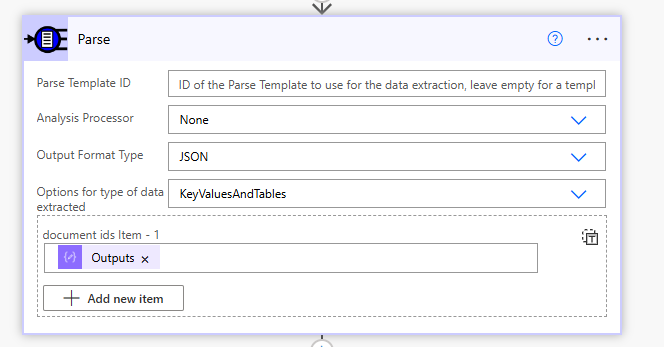
Choose New Step and search for Parse a set of documents by Template ID
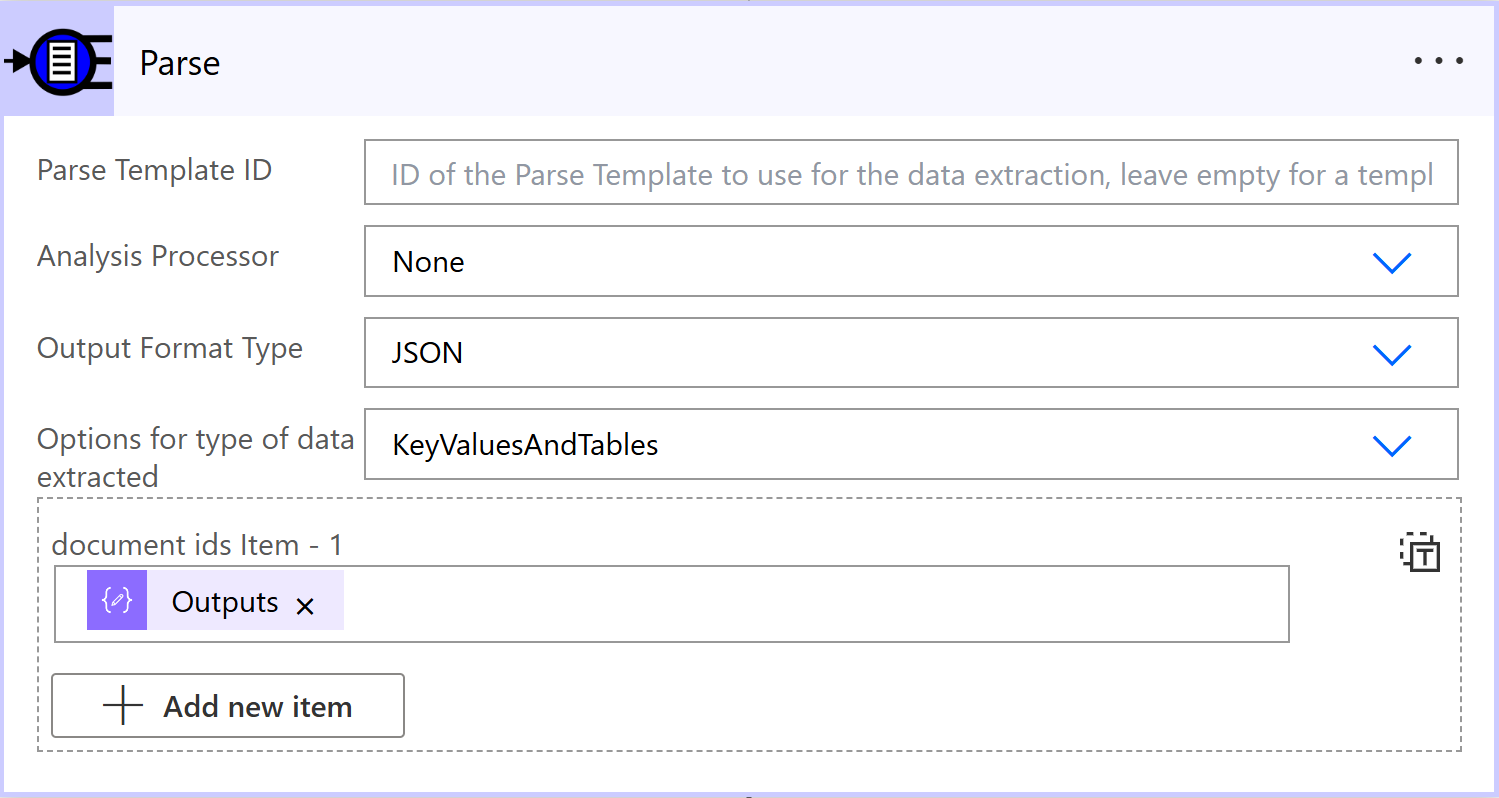
For this we leave the Parse Template ID blank, this is used when we have separate templates that we want to use but in this case we have designed the parse template on the document itself, we can always save this document as a reusable template later.
We choose None for Analysis Processor, JSON for the Output Format Type and KeyValuesAndTables for type of data extracted.
In the document ids item box use the designer to pick Id from the output from the previous step we called GetID.
Its worth testing the flow at this point to make sure we can get data from the document.
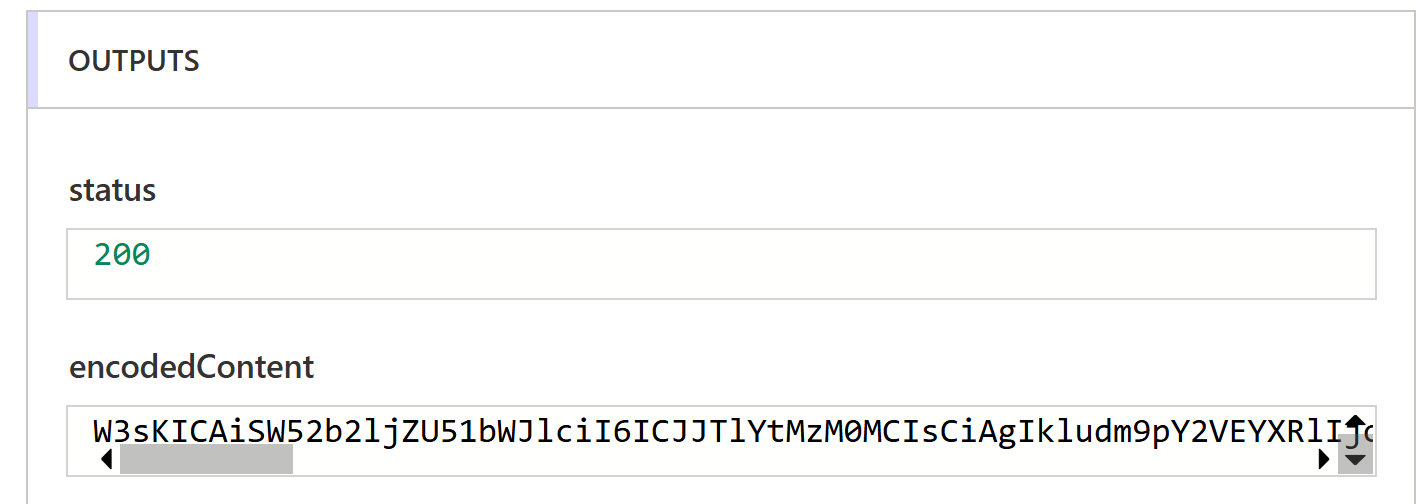
Once the flow has run we can check the output of the Parse operation. Note that there should be a status of 200 indication success and also a field called encodedContent, this is our JSON but base64 encoded as this call can also return an Excel workbook which as its a binary format needs encoding.
Power Automate can easily handle base64 so we add a new Step with a Compose Data Operation

We add the following in the expression
first(json(base64ToString(body('Parse')['encodedContent'])))
In this formula we are getting the field encodedContent from the body of the previous step then converting the Base64 to a string, as this is json we parse that into a JSON object, as that is an array we get the first object from the array.
At this point we should have the data in JSON format.

We’re going to add one more step as we would like to tell the designer the structure of this object to make it easier to reference the fields. Power Automate has a function Parse JSON which allows use to match the JSON to a schema and whats more if you paste in sample JSON it will generate the schema automatically.
So here I choose Generate from sample and have pasted in the JSON output from our document, notice i have remove the [ and ] from this JSON as we don’t want it parsed as an array, clicking Done will set this action up.
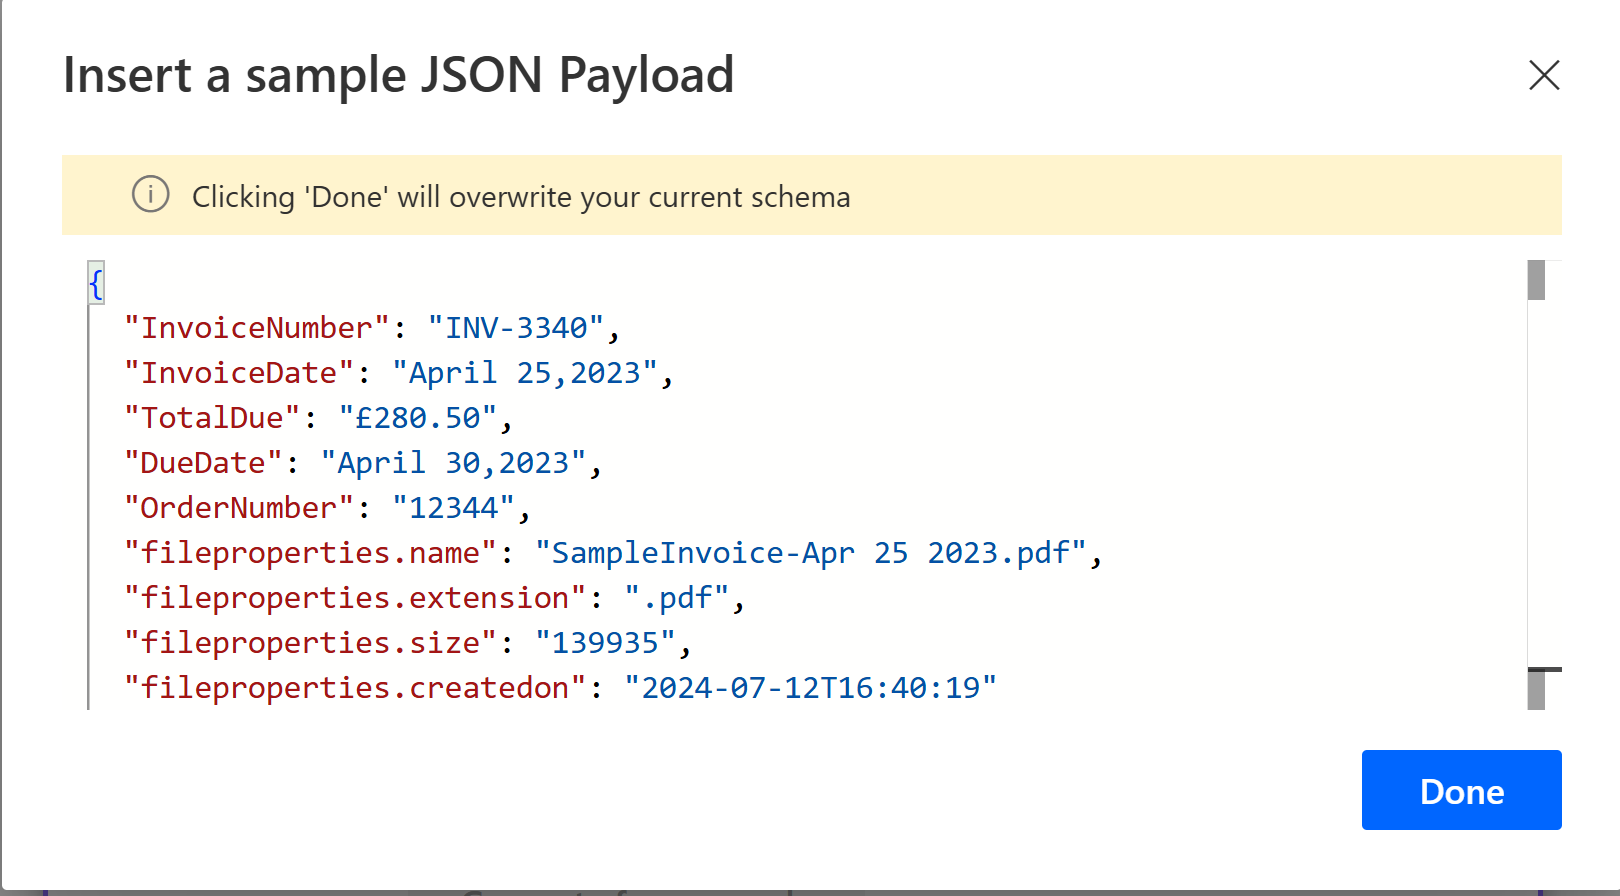
We have one more thing to do before we can insert the data to our Dataverse table and that is to convert the TotalDue field from a string to a number. We do this as the field has a £ character in it.
Once again we add a Compose operation and insert a formula to replace the £ with a empty character and convert the result to a float.
float(replace(body('ParseJSON')?['TotalDue'],'£',''))
We rename the operation to parseTotalDue.
Now we add a new step to save to the Dataverse. So in the Choose an operation dialog we choose the Microsoft Dataverse connector and in the Actions list pick Add a new row
In the Table Name field we select our table, in this case Invoice Details.
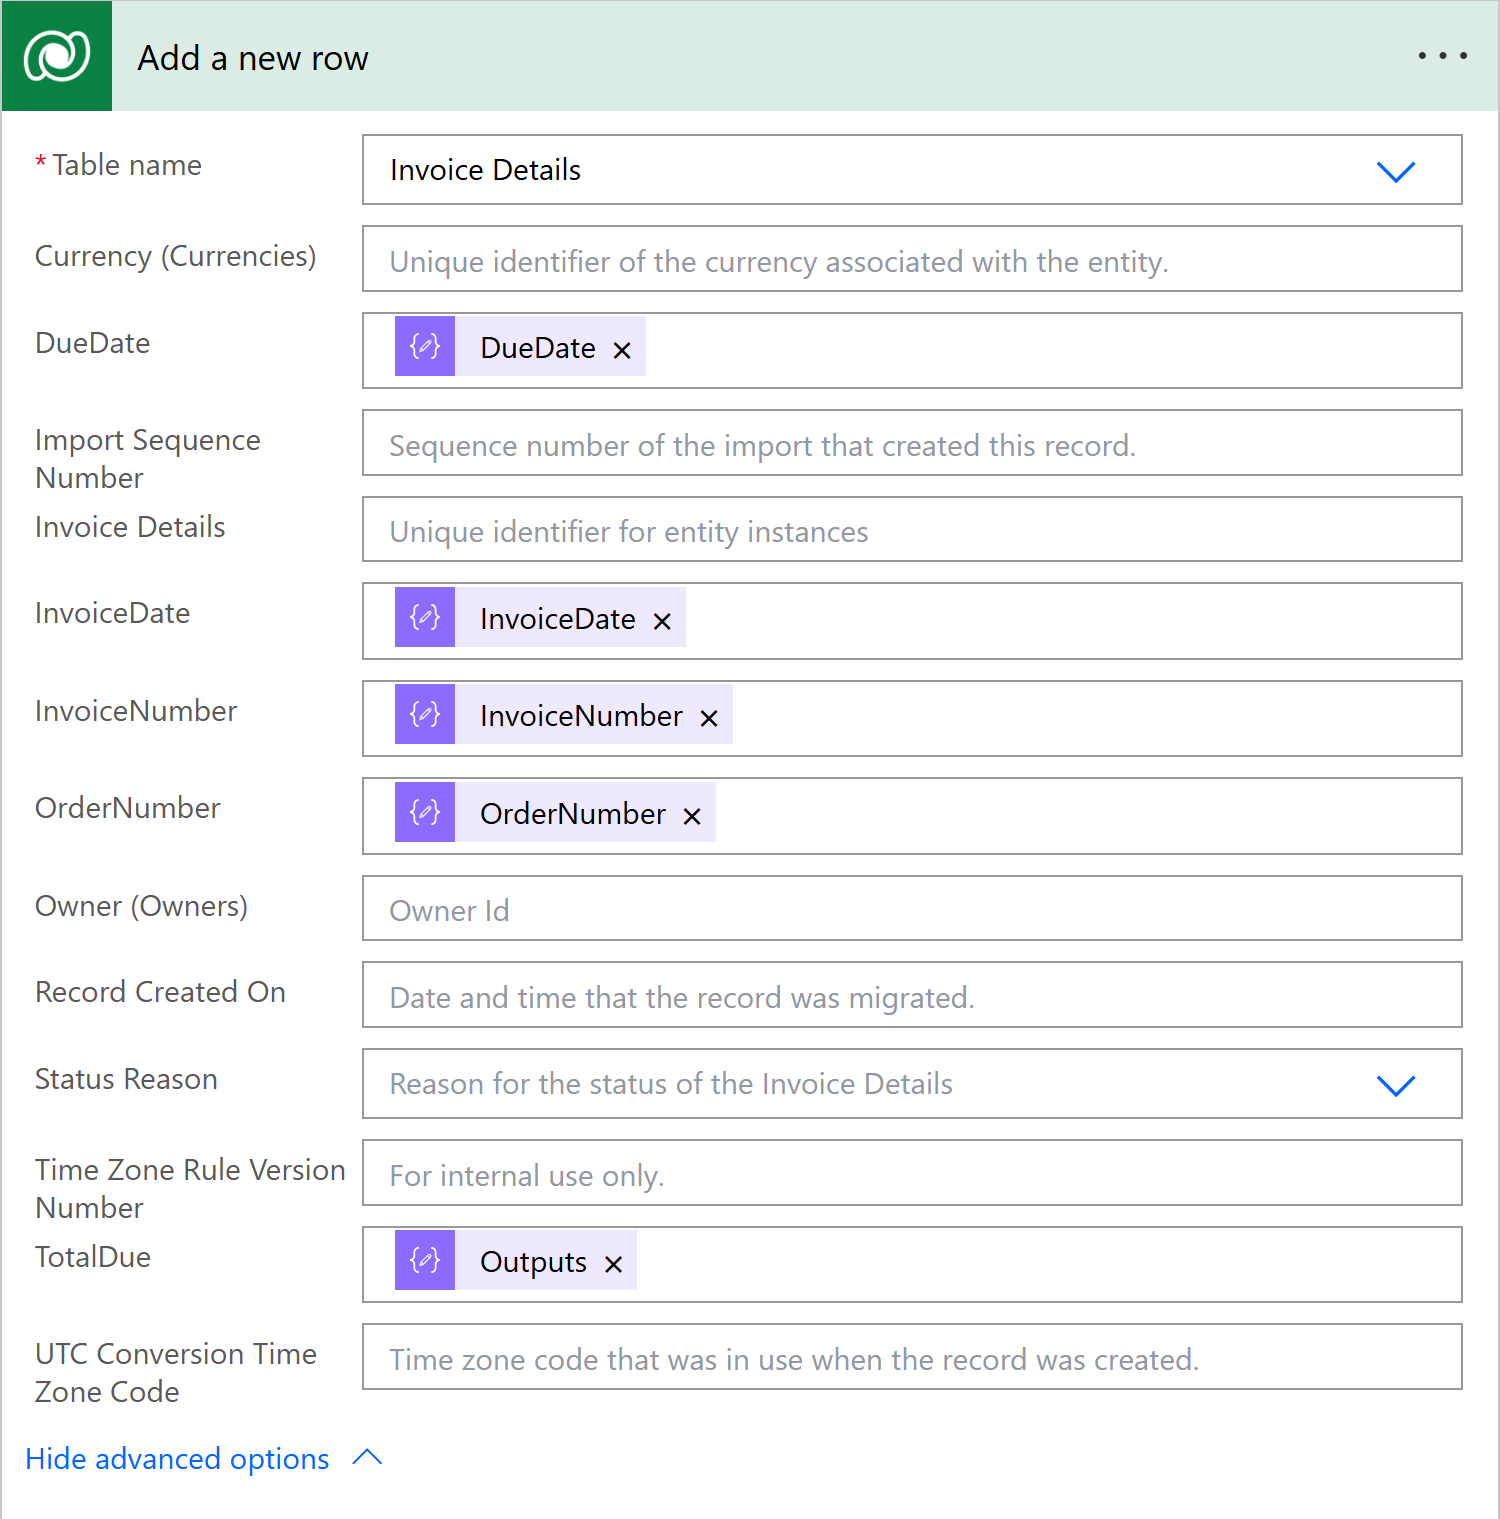
Here we map in our fields from the ParseJSON step: DueDate, InvoiceDate, InvoiceNumnber, OrderNumber.
For the TotalDue field we select the outputs of the parseTotalDue step.
We can now Save the flow and do a test run by clicking Test.
Note in the test flow the timings, extracting from a template is very fast and efficent. The whole flow ran in under a second.
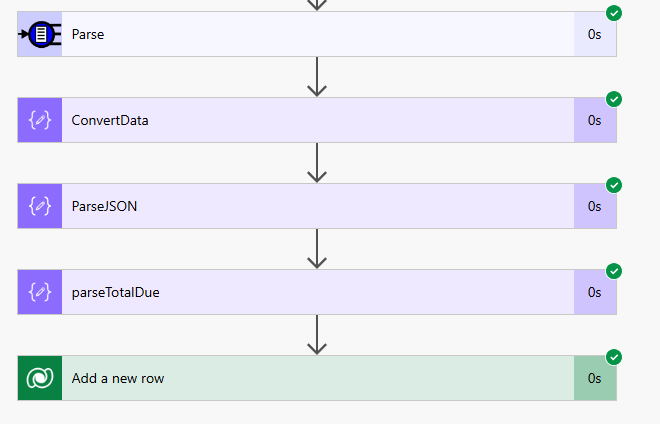
If we go to the destination table we can see the data has been parsed and inserted.

For a further tutorial on the Power Automate connector see our documentation
